Showing posts with label Cuttlebug. Show all posts

Wednesday, October 12, 2011

Cricut circle Blogaversary Monochromatic Color Challenge

I'm baaaaack friends! This challenge is the monochromatic color challenge at the Circle! The Challenge is to create a project of your choice using a monochromatic color scheme with at least 2 different cricut cuts.
I used a pink card from a pack of blank cards I purchased at walmart on clearance a while back and the color was perfect for the colors of the flowers I printed from the Imagine Lori's Garden at 3". The Thank You phrase and mat is from the Lori's garden cart that I changed the colors from blue and gree to pink. The butterfly border is from MS! I love that punch! Just got it and couldn't wait to use it! I used the Cuttlebug and a folder from "Love is in the Air" I think, for the embossed background, which I then used a white inkpad and went over the top of the embossing to enhance it a little. The glitter button in the middle is made from a pop dot! Clear and then rolled it in MS Cotton Candy glitter!! Perfect color!

Thanks for stopping by again! Wish me luck! this is again chosen at random and the prize is a gypsy!

Saturday, August 27, 2011

Cricut Circle August Monthly Challenge: Create a Scene Submission

Hello my scrappin' friends! Been a little while. I've been on vacation for a few days visiting family in St Louis. And thought about this challenge while high in the sky! I have so much scrapbooking to catch up on it was hard to choose which group to do a "scene challenge" with! But I always love spring and Easter! so...for this challenge I chose a few Easter pics from Spring from a couple of different seasons, thats why some have jackets on and some don't! The Easters in March are sometimes cool here in Texas! Just having to pick out a few pics helped remind me I really need to get all the years scrapped!!
The Cricut Circle challenge is to create a scene with cricut cartridges! of course...preferably, but not required, using the 4th quarter Circle Cartridge: Pop-up Neighborhood. This was my favorite circle cart until we just received "Sophie"!! Love this one most of all the Circle carts! Awesome...Well, you only had to use 2 cuts! I used a whole lot more than that! and I made some I didn't even end up using! The winner is chosen at random (thank goodness! I might have a chance!) and the prize is:


Recipe: (yikes, I hope I remember them all! The gypsy doesn't show you what carts it uses on the Imagine app)
Imagine
Expression 2
Gypsy
The background pages were printed on the Imagine using the Better Together Bonus section and printed full pages.
Cuttlebug and d'vine swirls and swiss dots
Imagine Better Together: little girls on right side cut at 2.5" and balls cut at 1"
Imagine Best Friends: girls on left side of page cut at 2.5", kite at 4", doghouse at 4", flowers cut at 1"
April Showers for the Spring Banner cut at 9"
Campin Critters for the tree with dog peeking out
Pop up Neighborhood for the tree with tire swing
Kate's ABC's for the little bunny in the left hand corner
Lori's Garden for the butterflies, cut and doubled at 1"
Playtime for Playtime title
Enjoy the Seasons for the barbecue pit cut at 3"
Thanks for stopping by!! Hope I remembered them all! Wish me luck! and if you're entering, I wish you luck!! That would certainly buy a few carts at least!


Wednesday, August 3, 2011

Cricut Circle Challenge #37: Technique Challenge Submission


The challenge this week on the circle blog is to use a technique that one of the design team members used the previous week. I chose to use Suzanne's technique to cut shapes from vellum and use the cuttlebug machine to emboss. I've had this design on my gypsy for a while because I was beginning to think "Christmas cards!" That is already miles ahead of last year. I was determined not to wait a week before Christmas before finishing my cards! The design is always the hardest part for me! This challenge gave me the opportunity to try out my design. I will change a couple of things I think, but this one was perfect for the challenge.

 Isn't she pretty!? I love angels! Half my home's decor is angels! One of my bathrooms is angels! 
Recipe:
Joys of the Season cartridge (one of my favs for Christmas!) for the card base and angel and wings. The wings were cut with the vellum and then embossed with Holographic embossing powder as well as the angel boy. I had to add a little fairy dust to the Holographic to add a little color to distinquish it from the gold on the base. I should have used white for the angel, but I was on a roll with the gold! :-) That holographic embossing powder by Ranger is awesome!
Gold metallic paper is from Collections.
Martha Stewart Stars border on the inside.
Cricut Cuttlebug and embossing folder to emboss the card, wings and angel window. I think the folder is called "divine swirls"? I wrote the name on most of them, but I guess I thought I'd remember that one! of course, I didn't! After embossing the background I used gold MS cats eye pigment dye to highlight the swirls that look like clouds to me! and also used it on the outline of the card base. Card base is a cream color of HL cardstock paper pack.
Hope I've inspired you to maybe start your christmas cards! And check out the holographic embossing powder if you are into embossing! If you're not, this might change your mind on applying it! I was a little intimidated to try embossing but I loved this shine so much I had to try! Now I use it every chance I get!! 
Thanks for stopping by! Maybe I'll see you in the "circle"! If you aren't a member but are interested there is more information at cricut.com


Well, I was afraid just the angel and wing would only count as 1 cut and rules stated 2 so I added this embellishment from All Wrapped Up, cutting it with my E2! That's one of the good things about the E2! The glittery paper is from DCWV Linen Closet and the glitter paper used for "rejoice" is from DCWV Flower Glitter 4x6 stack. You can't see it very well in the pic but the glitter on the background of rejoice matches the angel! Perfect! It was tough getting the "Rejoice" cut at that size with that thick glitter paper! took about 5 different settings on the E2 to get it right. Kept cutting off the e's. If someone needs the settings to get this right, just email me or post a comment requesting that info. That glitter paper in that stack is pretty thick. Thanks again for stopping by again! this is the last time I promise!!

Wednesday, November 24, 2010

Circut Circle Monthly Submission

NOVEMBER CIRCLE MONTHLY CHALLENGE: HOME SWEET HOME
The theme for this month’s challenge is all about cozying up your home with Handmade Home Decor! Please create a home decor project. Project must be newly created for this challenge and should include the following elements to qualify:
  • Use atleast one Cricut Cartridge Cut
  • Use the Cuttlebug in some way (embossing folder, Cuttlebug die, Quilling kit, etc.)
  • Use Felt in some way
  • Use the color GREEN somewhere on your project


I created these advent trees for my grandkids! Chance loves the color blue so I made his tree blues and greens! Had to have 1 color from Christmas!! Faith chose pink, I haven't completed hers yet, because I have more time to give her hers. Chance and Joslyn I need tomorrow, because I won't see them again before the 1st. They've already been asking for them! Joslyn gets the red and green one. This is her first year. She's 3 going on 10! She'll be 4 in March and I just couldn't take one to Chance and Faith and she not get one! She's a close friend of the family, actually she is my SIL's neice. I made the sour cream containers, with a little help from a paper crimper, a little bigger this year because 4x6 just wasn't big enough for much. I got the inspiration from Christmas with the Cricut  last year. They have awesome idea for all things crafts, mostly with the cricut, but not always, now year round! I wanted to put little Matchbox cars in some of Chances and you need 6x6 for those. I cut all the papers at 6x6 and trimmed off the end after I fit what I wanted, just sealing up one of each side to start, then after trimming used a quick dry glue and punched the hole and ran the ribbon and card thru. The numbered cards are from Designers Calendar! Sure wish I had that last year!! I designed them all by welding them all!! I embossed the white card square behind the number that was cut from Christmas cheer with my cuttlebug using the Snowflake folder. The scalloped card background portion is also from Christmas cheer. All was cut with the Imagine using cut only. I used Gypsy to put all the numbers on 1 page. The felt is the skirt under the tree. They are loaded with all kinds of little toys and stickers! Joslyn loves dinosaurs so hers has quite a few dinosaurs. There's moolah in some of the packages too for those that are ready for it!!

Thanks for visiting! Wish me luck. Winner gets a YUDU!! Woohoo! Luckily it is chosen at random or I wouldn't stand a chance against the competition out there!

Big Thanksgiving hugs to you all!!  I'll see you on the next blog hop in a couple of weeks unless I get some cards completed!

Monday, October 18, 2010

My entry for week #3 Circle Challenge!

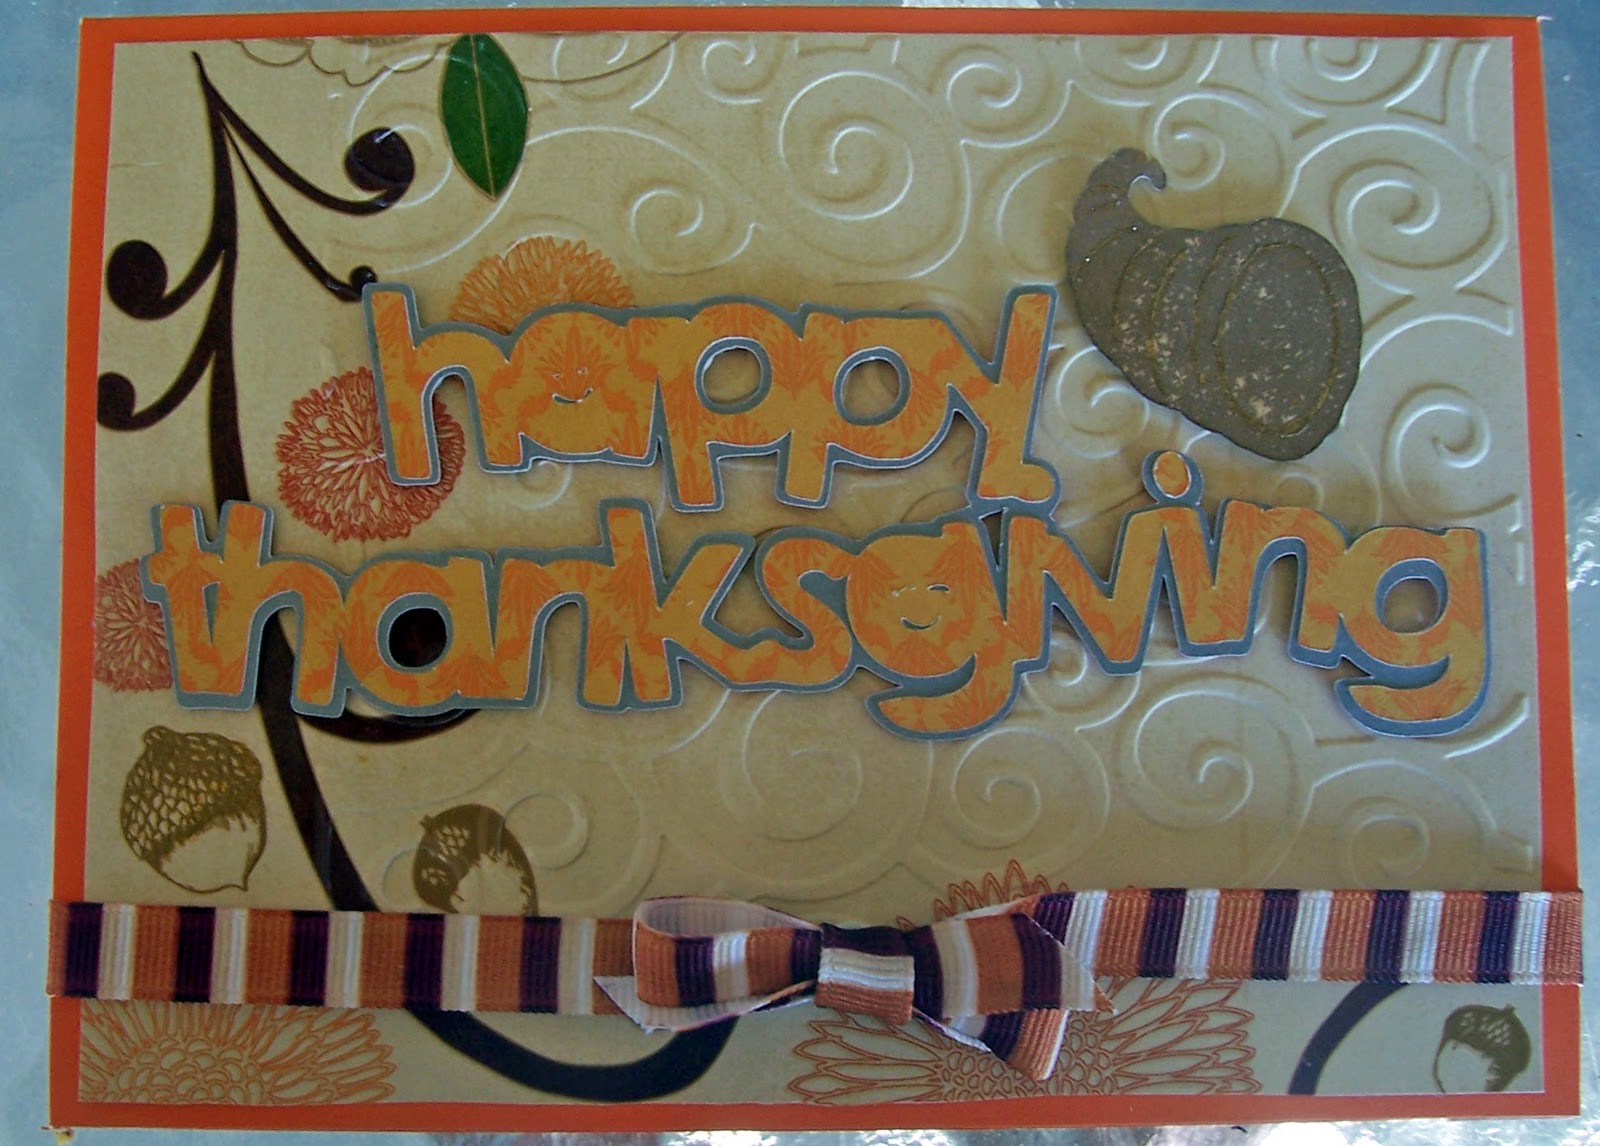
This week Cricut Circle wants us to incorporate the colors of gray, orange, tan and burgundy, AND add lots of TEXTURE to the project.Create a project of our choice (card, scrapbook page, home decor project, . . . the sky’s the limit!)and must include atleast 2 cuts to qualify. I had a hard time with the gray!! I had to make the shadow in gray. And the flourish on the card is burgundy but it didn't come out that color in the picture.  As well as the colors in the ribbon. It has burgundy stripes also. The colors never look the same on the computer to me! Prize this week is $25 for Cricut.com store. I'm enjoying these challenges! But have to get back to finishing up my personal projects. I finally finished the baby album. Have to take pictures and post it here next!!  I wish I had been more of a cardmaker than a scrapbooker! Cards are harder to make for me right now! So these are definitely challenges even before they request specific itmes or colors!!

I used one of my favorite carts, Simply Charming for the "happy thanksgiving" and PDDU for the cornucopia! The Paper is DCWV Autumn stack. The paper for the cornucopia was white paper that I colored on my computer and printed on an HP printer and then cut with my Imagine. And of course the background flourish was done with my Cuttelbug.

Thanks for stopping by and have a great week!!

Wednesday, August 11, 2010

Finally getting around to the Wedding album!


I've been reading blogs and playing catch up too much to get the album started! Wedding was beautiful. It was very hot. 105 that day! And of course I've been researching all of my carts for embellishments! I also bought 3 more carts I'd been eyeing and they came up on Ebay late 1 night and I could help myself! I just love that "Rock Princess". My granddaughter is a Rock Princess! That one had been calling me since I saw it on the "Chirp"! And Country Life is so darn cute too! Cindy Loo is just precious! I think Rock Princess is going to be my favorite for a long time!!

Grab a drink and/or snack! This will take a few!

I also got invited to a "crop" by a friend. Her church has started one up! Woohoo! I had a blast! I was able to help those ladies with all kinds of things! A few weeks ago one of my friends had been asking about scrapbooking and saying how she can never find what she wants in lower case letters and I told her about the cricut and SCAL! My 2 favorite toys! She went out and bought a Cricut and brought it to the crop! I was able to help her a lot! None of those ladies had ever had any experience with one. They'd seen them but was afraid to buy it and not be able to use it! Now they are all going to get one!! I told them all about the message board and those wonderful angels, for help and ideas, and they told me to "stay by my phone! Cause I'm their new bestest friend" I love it! And they were really blown away by my Gypsy! They didn't have room to learn that to in the same night they said!!

So this is the front! I used the bride and groom from the "wedding" cartridge and cuttlebugged the dress. The book is from Tuesday Morning. Love that store too! It was on clearance for $5! Its 8x8. I thought the buttons looked kinda hokey all by themselves for a wedding album, so I added the lace. I like that a lot. I was afraid the paper wouldn't stick too well to that material so I used black vinyl for the black layer. Worked great!! I have a ton of that because I bought 15 yards from Sign Warehouse for $1.00. Not a typo! And only $6 shipping. Still cheap!! I probably will change the "Treasure this Day" rub on. I didn't have what I wanted! All the letters I have that I liked only had 1 "D"! Wedding unfortunately has 2! If I find or make what I want, I'll repost!

I hear the white zinfandel calling me! Are you ready for 1?! Thanks for stopping by!

Blog candy alert!

http://theartisticstamper.blogspot.com/search/label/blog%20candy